Introduction: Lace That Defies Gravity
You have seen those gorgeous embroidered lace ornaments, bookmarks, and jewelry pieces. They look like something from a high-end boutique. No fabric backing, just pure thread holding itself together in intricate patterns. You want to make them, but every time you try, the design falls apart or looks like a tangled mess. Here is the secret: Free Standing Lace is not regular embroidery. It is a completely different beast. And if you do not know how to properly Digitize FSL File for Embroidery, your lace will dissolve right along with the stabilizer.
I have been down this rabbit hole. The first few FSL designs I tried looked more like bird nests than lace. But once I learned the rules, everything clicked. Today, I am going to walk you through exactly how professional digitizers create FSL that stands the test of time. No fluff, just the techniques that actually work.
What the Heck Is FSL Anyway?
Free Standing Lace, or FSL, is exactly what it sounds like. You stitch a design onto water-soluble stabilizer, then wash that stabilizer away. What remains is a lace structure made entirely of thread. No fabric, no backing, just pure embroidery holding itself together .
Sounds like magic, right? It kind of is. But here is the catch: regular digitizing techniques do not work for FSL. When you stitch on fabric, the fabric supports the thread. With FSL, the thread has to support itself. That means your digitizing needs to build structural integrity into every single stitch .
The most successful FSL designs share a few key traits. They are interconnected, meaning no floating or isolated elements that might detach after the stabilizer dissolves. They have a solid foundation layer that acts like a skeleton. And they include a satin stitch border that seals everything together .
The Golden Rule of FSL: Two Layers, Opposing Angles
Here is the number one thing that separates good FSL from garbage. Your base fill needs two layers with crisscrossing stitch angles.
Think of it like plywood. One layer of stitches going in one direction has weak spots. But when you lay a second layer at a 90-degree angle on top, the threads lock together and create a sturdy mesh .
Here is how you do it in practice. Digitize your first fill layer using a Tatami or fill stitch. Set the stitch angle to 45 degrees. Keep your density around 0.4 to 0.6 millimeters—looser than regular embroidery because you want that airy lace look, not a solid patch .
Now duplicate that entire shape. Change the stitch angle to -45 degrees or 135 degrees. That crisscross pattern is what gives FSL its strength. Some digitizers even add a third layer at 0 degrees for extra stability on larger designs .
Pro tip: Use the same thread color for both layers. Unlike regular embroidery where you might switch colors for effect, FSL needs consistency so the lace looks uniform front and back.
Satin Borders: The Glue That Holds Everything Together
Your crosshatch foundation does the heavy lifting, but it needs a frame. That is where satin stitches come in.
A satin stitch border runs along the outer edge of your FSL design. It serves two purposes. First, it gives the lace a clean, finished look. Second, and more importantly, it seals the edge so individual threads do not start unraveling over time .
Digitize your border using a satin stitch column tool. Set the width between 2 and 4 millimeters, depending on the size of your design. For most FSL projects, a 2.5 millimeter satin border strikes the perfect balance between visibility and delicacy .
Here is a trick professional digitizers use. Add a run stitch just inside the satin border before you lay down the satin stitches. That run stitch gives the satin column something extra to grip onto, especially at sharp corners or tight curves where the satin might otherwise pull away .
The Matching Bobbin Rule Nobody Tells You
Regular embroidery hides the bobbin thread on the back of the fabric. But FSL has no fabric. The back is just as visible as the front, especially on hanging ornaments that spin around .
That means you cannot cheat with white bobbin thread on a red design. The bobbin thread must match your top thread, color for color.
If your design has three colors, you need three matching bobbins. When you switch from green leaves to white petals, change both the top thread and the bobbin thread. Yes, it is more work. But the result is a lace piece that looks stunning from every angle instead of having a messy, ugly back .
Some digitizers take this further and use pre-wound bobbins specifically matched to their thread colors. That speeds up color changes when you are running multiple FSL pieces.
Stabilizer Selection: Mesh, Not Film
Walk into any embroidery supply store and you will find two types of water-soluble stabilizer. There is the thin, shiny film that looks like plastic wrap. And there is the fibrous mesh that feels more like paper or fabric.
For FSL, always choose the fibrous mesh.
Here is why. The film style punctures easily. When you put thousands of dense stitches through it, the film tears and stretches. Your design distorts. The mesh, on the other hand, mimics fabric. It grips the stitches and maintains its structure throughout the embroidery process .
For most FSL projects, one layer of heavy-weight fibrous stabilizer works fine. But if you are stitching a particularly dense or large design, use two layers. It is better to have too much support than not enough. The stabilizer washes away either way, so err on the side of caution .
Step-by-Step: Digitizing Your First FSL Design
Let me walk you through a complete FSL digitizing workflow from start to finish. I will use a heart ornament as our example, but the same principles apply to snowflakes, butterflies, or any other FSL project.
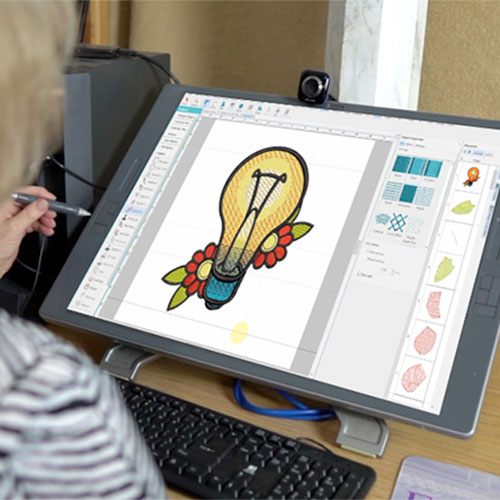
Step one, open your digitizing software. Wilcom, Hatch, Embird, and InkStitch all work for FSL. Set your hoop size. For a first project, stick with a 4×4 or 5×7 hoop. Bigger designs require more structural planning .
Step two, digitize your base shape. Use the closed shape tool to draw a heart. Make sure your curves are smooth. Sharp angles create stitching problems later .
Step three, convert that shape to a Tatami fill. Set your density to 0.5 millimeters and your stitch angle to 45 degrees. Generate the stitches .
Step four, duplicate that exact shape. Change the stitch angle to -45 degrees. Now you have your crisscross foundation. The two layers should overlap and create a grid pattern.
Step five, digitize your satin border. Trace the outer edge of the heart using a satin column tool. Set the width to 2.5 millimeters and density to around 0.4 millimeters .
Step six, add decorative elements. If you want flowers, swirls, or text inside the heart, digitize them using satin stitches or additional fill layers. Keep everything connected to the main structure. No floating elements.
Step seven, check your color stops. If your design uses multiple colors, make sure each color change also changes the bobbin recommendation in your file. Export as DST or PES for your machine.
Common FSL Digitizing Mistakes to Avoid
I learned these lessons the hard way so you do not have to.
First, never use pull compensation the same way you do for fabric embroidery. FSL needs less pull compensation because the stabilizer does not stretch like fabric does. Start with 0.2 to 0.3 millimeters and test from there .
Second, do not make your stitches too dense. FSL is supposed to be lace, meaning you want to see through it. If you pack stitches too tight, the design becomes stiff and plastic-like instead of flowing like fabric lace. Keep your fill density between 0.4 and 0.6 millimeters .
Third, watch your underlay. Regular embroidery often uses heavy underlay to stabilize fabric. FSL uses minimal underlay because the stabilizer itself provides the support. Too much underlay just adds bulk without benefit .
Fourth, never use lock stitches in the middle of an FSL design. Those little knots create hard spots that ruin the delicate feel of lace. Save your lock stitches for the very end of the design .
Testing and Finishing Your FSL Design
You digitized your file. Now it is time to stitch it out. But do not jump straight to your final project fabric. Test first.
Hoop your water-soluble mesh stabilizer nice and tight. It should feel like a drum skin. Loose stabilizer shifts during stitching and distorts your design .
Run your test. Listen to the machine. FSL is dense, so the machine works harder than usual. A rhythmic chugging sound is normal. A high-pitched whine or slapping sound means something is wrong. Stop and check your tension or needle .
After stitching, cut away the excess stabilizer, leaving about half an inch around the design. Then soak in warm water. Here is where you control the final texture. Soak for 30 seconds for a stiff, structured lace. Soak for five minutes for a soft, flowing lace. The stabilizer is starch-based, so more water means less stiffness .
Press the finished lace between paper towels to remove excess water. Let it air dry completely, then press with a warm iron on a medium setting to flatten.
When to Hire a Professional Digitizer
Look, I am all for learning new skills. But FSL digitizing has a steep learning curve. If you need production-ready FSL files for a business or a large project, sometimes it makes sense to hire someone who does this every day.
A professional digitizer charges anywhere from $15 to $40 per FSL design. They handle the underlay, the pull compensation, the satin borders, and the color changes. You get a file that sews clean on the first try .
The best digitizers will ask about your fabric type, your machine, and your desired final texture before they start. If someone promises a one-click auto-digitized FSL file, run away. FSL requires too many manual decisions for automation to work reliably.
Conclusion: From Pixels to Permanent Lace
You now know what separates professional FSL from amateur experiments. A strong crisscross foundation, matching bobbin threads, fibrous stabilizer, and satin borders that seal everything together. When you Digitize FSL File for Embroidery using these techniques, your lace stands on its own. No falling apart, no ugly backs, no stabilizer residue ruining the finish.
Take one design this week. Apply the two-layer rule. Match your bobbins. Test on scrap stabilizer. I promise you will see the difference the first time you wash that stabilizer away and hold pure thread lace in your hands.
Now go make something beautiful. Your machine is waiting.
No Responses